Design & Placement4 min readUpdated August 22, 2026

3-Camera System Planning

Quick answer

Three cameras can be a practical starting point when each camera has a clearly defined job. The goal is not to claim complete property coverage. It is to choose the three views that matter most, then confirm that the selected locations can support useful framing, lighting, cabling, and recording.

Compare complete camera systemsSearch all guides โ†’

Three cameras can be a practical starting point when each camera has a clearly defined job. The goal is not to claim complete property coverage. It is to choose the three views that matter most, then confirm that the selected locations can support useful framing, lighting, cabling, and recording.

This guide explains how to plan a 3-camera security system and how to choose between SecureViewโ€™s separate installed-bundle and Standard DIY paths.

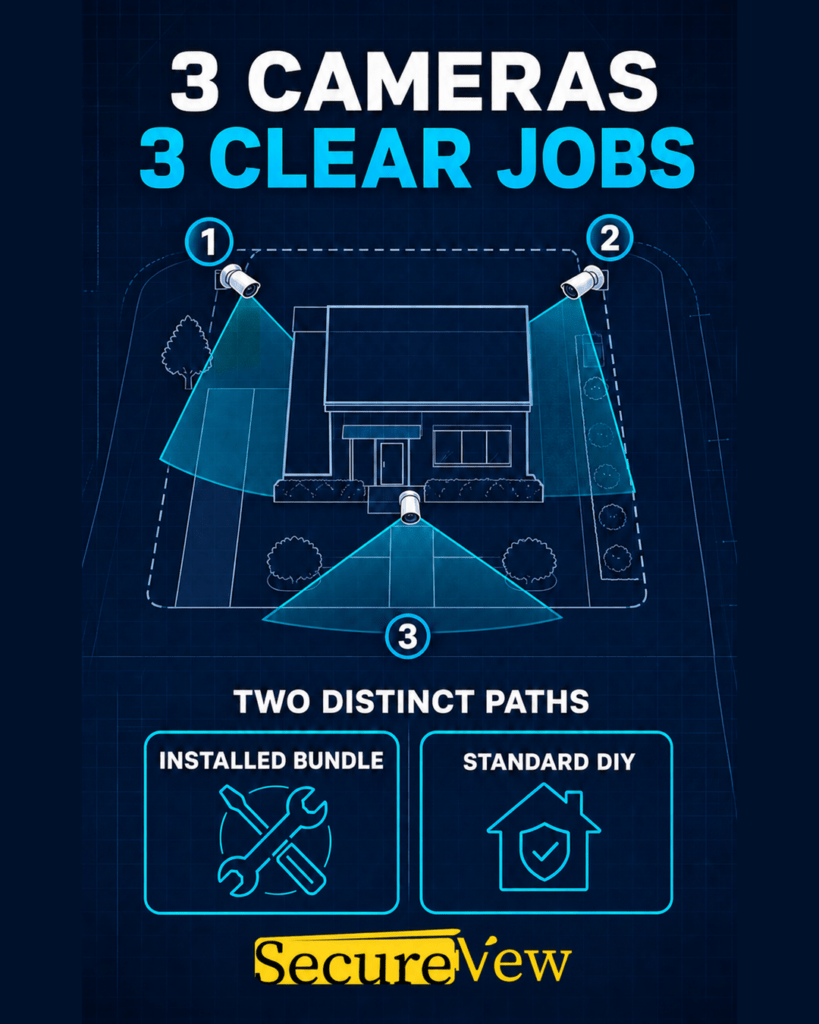
Three-camera security system planning diagram with three numbered viewing zones and separate installed and DIY paths.
Use three clear viewing objectives, then choose the professionally installed or Standard DIY path that fits the project.

Start with three viewing objectives

Before selecting camera models or mounting locations, write down what each view needs to document. For many small properties, the first planning pass includes:

  • Primary entrance: the door, gate, or approach used most often.
  • Vehicle area: a driveway, parking space, garage approach, or delivery zone.
  • Property-specific priority: a side entrance, rear door, yard, walkway, service area, or another location that matters to the property.

These are examples, not a universal layout. A three-camera plan should follow the actual property, the expected activity, and the evidence goal for each view.

Lighting and blind spots belong in the same planning conversation. CISAโ€™s personal-security guidance also recommends coordinating exterior lighting and camera positioning to reduce blind spots.

Match each camera to one clear job

A wide overview and a tighter identification view solve different problems. Trying to make one camera cover every direction can leave important activity too small or too far from the camera. For each proposed location, ask:

  1. What exact area should appear in the frame?
  2. What detail should the recorded video preserve?
  3. What lighting conditions occur during the day and at night?
  4. Can the camera be mounted and wired without creating an unsafe or impractical route?
  5. Could landscaping, vehicles, doors, or seasonal changes block the view?

If those questions produce more than three distinct priorities, use the camera-count planning guide before selecting a system. The security camera placement guide can also help you separate overview, approach, and identification goals.

Choose the service path before you buy

SecureView lists two distinct 3-camera paths. They should be compared as separate products rather than treated as interchangeable versions of the same offer.

Professionally Installed 3-Camera Bundle

The professionally installed path is for customers who want SecureView to handle or coordinate the on-site scope. Professional service may be available or coordinated depending on location and project requirements.

View the professionally installed 3-camera bundle

SecureView Standard 3-Camera DIY System

The Standard DIY path is an equipment option for customers planning to handle setup separately. DIY equipment can ship nationally.

View the SecureView Standard 3-camera DIY system

When three cameras may not be enough

A three-camera system may be too limited when the property has multiple entrances, detached structures, long approaches, separate parking areas, interior cash or inventory zones, or several blind spots that cannot share a useful view. Camera count should follow the number of distinct viewing objectivesโ€”not the number of corners on a building.

It is better to identify an uncovered priority during planning than to discover it after setup. If the layout is uncertain, sketch the property, mark entrances and high-priority areas, and compare those marks with the three available views.

Three-camera planning checklist

  • Name one clear objective for each camera.
  • Confirm the frame is not blocked by doors, vehicles, landscaping, or structures.
  • Separate overview needs from identification needs.
  • Consider daytime and nighttime lighting.
  • Confirm practical mounting and cable routes.
  • Choose the installed or DIY service path before ordering.
  • Move to a larger system if important objectives remain uncovered.

Frequently asked questions

Can three cameras cover an entire property?

Not necessarily. Coverage depends on the property layout, the required detail, obstructions, and the purpose of each view. Three cameras should be treated as three planned viewing objectives, not a promise of complete coverage.

Should each camera face a different side of the building?

Only if those sides are the highest-priority areas. Entrances, vehicle approaches, service areas, and other activity zones should guide placement.

What is the difference between the installed and DIY paths?

They are separate SecureView products. The professionally installed bundle includes an on-site service path that depends on location and scope. The Standard DIY system is an equipment path that can ship nationally.

For more planning resources, visit the SecureView Security Learning Center.